

Panel/Holoviews Learning Aid
Published December 14, 2020

Adam Lewis
This blog post is adapted from a notebook designed to help you learn how to make apps in panel in about 15 minutes. Screenshots of cell outputs are included for convenience below, but it is strongly recommended that you use the interactive Binder version (takes 1-2 minutes to load) or clone the repo and run the demo locally.
Building a Web App With Panel and Holoviews
Sample App
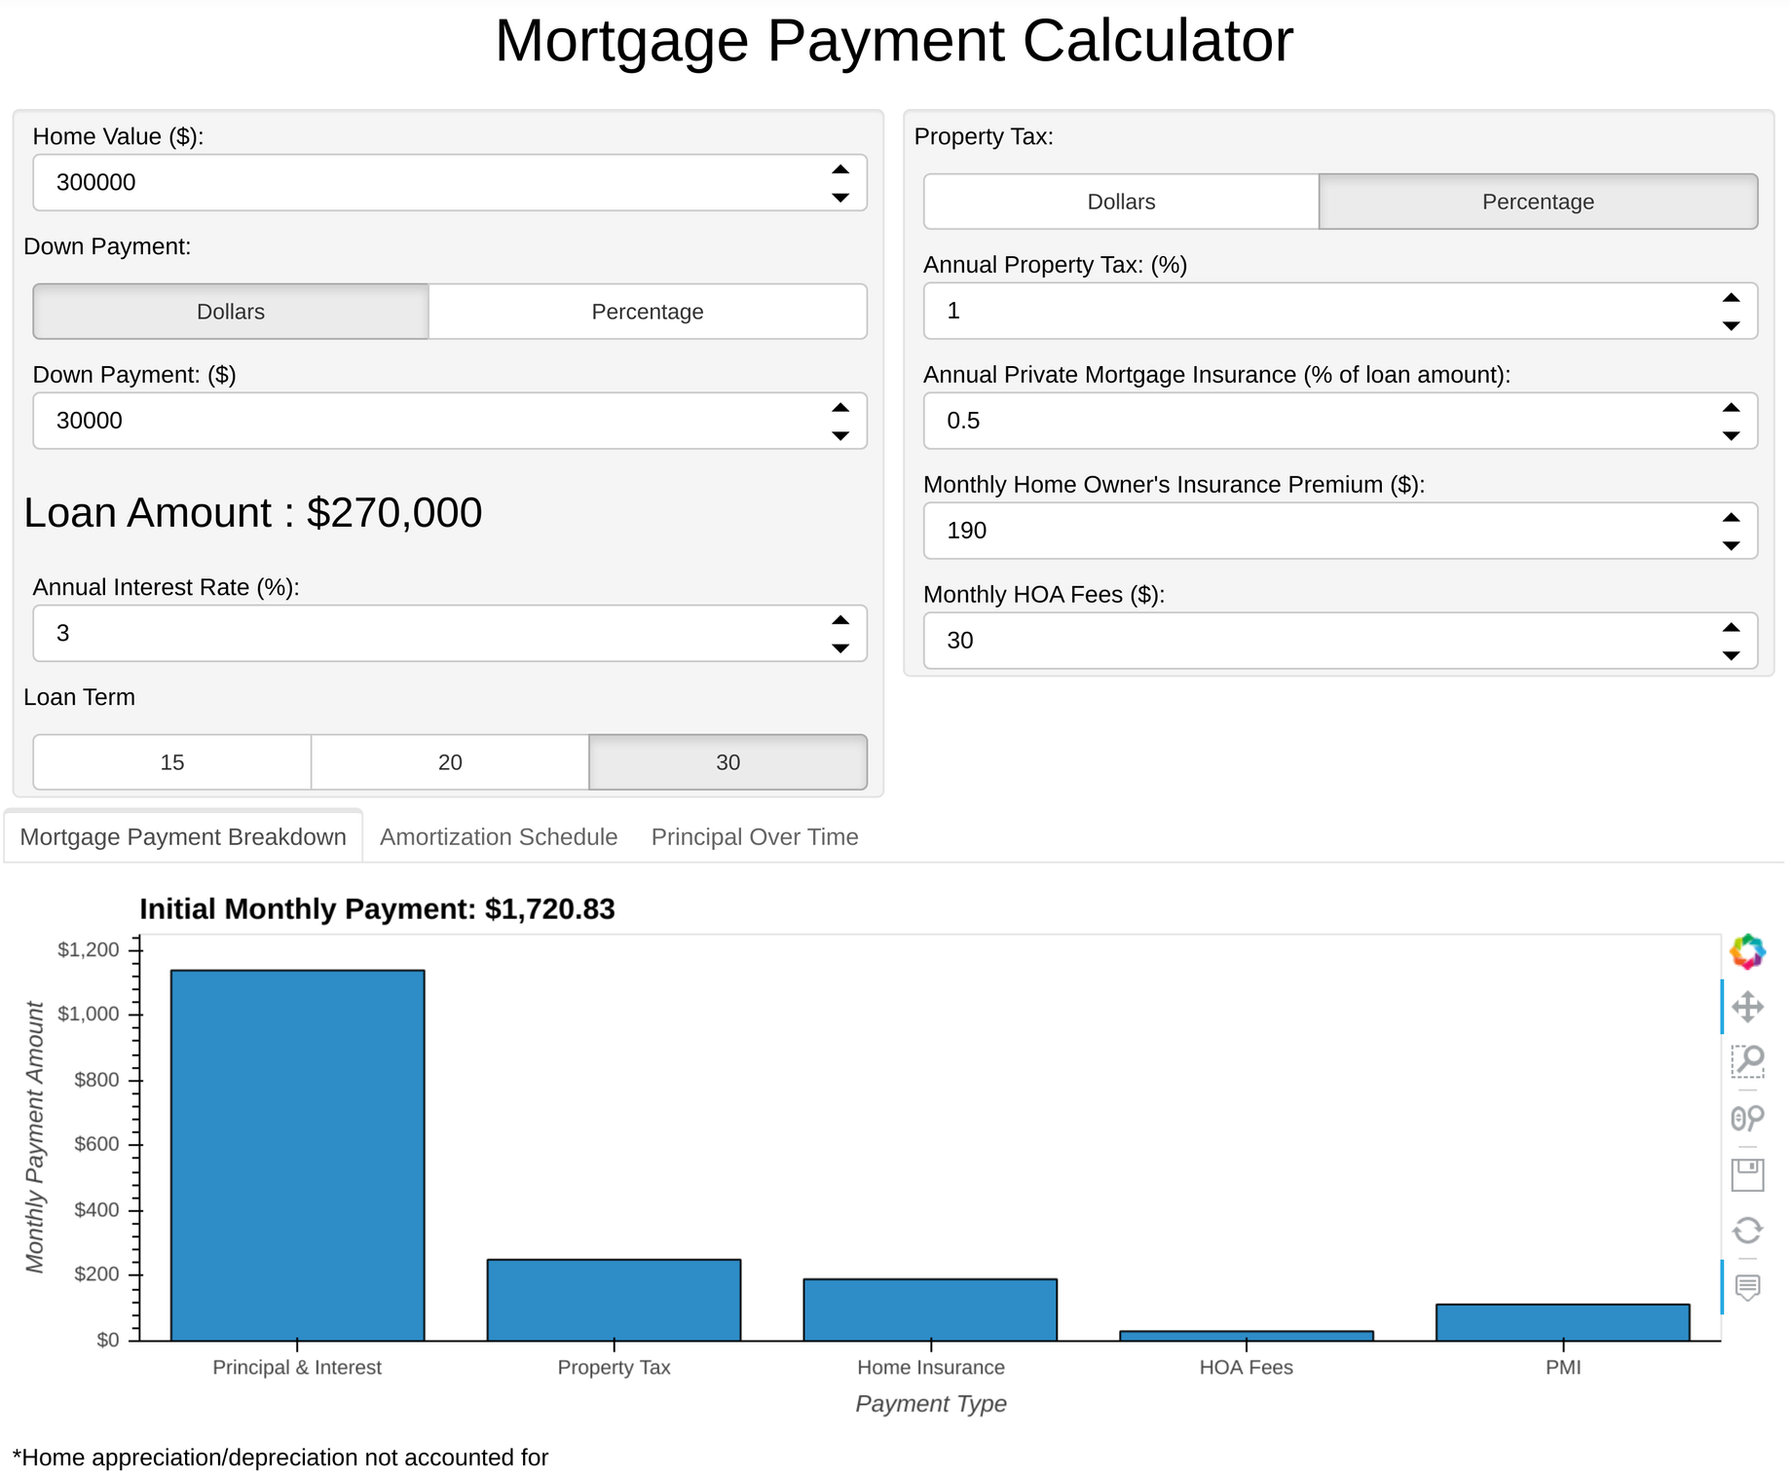
Try out the app below. It's a mortgage calculator app allowing you to see your mortgage payment, amortization schedule, and principal paid over time.
Note: For the app below to work in JupyterLab, you'll need to run
jupyter labextension install @pyviz/jupyterlab_pyviz in the terminal to
install the needed Labs extension. This is not needed if running in a Jupyter
notebook outside of JupyterLab.
The app above was built with Python, and without directly writing any CSS or Javascript. Panel and Holoviews are a great way for data scientists or others to build a web app. This learning aid is designed to demonstrate some common usage, and encourage you to build your own app from there.
Learning Aid
Several sections follow below demonstrating key knowledge used to build the app above.
- Background
- Building the App Backbone
- HoloViews Plots
- Closing Notes
1. Background
Prototyping in Jupyter
Panel and Holoviews are nice because they integrate well with Jupyter notebooks and Jupyterlab. You can build your app and display it interactively in Jupyterlab to speed up development. For this to work however, make sure to:
- If running in JupyterLab, run
jupyter labextension install @pyviz/jupyterlab_pyvizin the terminal to install the needed labextension if you didn't above. This is not needed if running in a Jupyter notebook outside of JupyterLab. - Run
import panel as pnandpn.extension()at the top of the notebook.
After doing so, you should be all set to prototype the app within JupyterLab.
Panel Basics
Panel has 3 main components: panes, widgets, and panels.
- Panes wrap external viewable items, like markdown, plots, gifs, and even video.
- Widgets are used to manipulate your app - think sliders, file selectors, password inputs, etc.
- Panels are used to arrange panes and widgets. The 4 main types of panels
are
Row,Column,Tabs, andGridSpec.
Take a look at more examples of panes, widgets, and panels (layouts) at the Panel Reference Gallery. You can also learn about what parameters each widget supports by clicking on a particular widget from there.
2. Building the App Backbone
First, let's make a widget by running the code below.

When choosing a widget for your app, try to choose a widget made for the
applicable datatype (string, float, int, set, etc.). This will greatly
reduce the amount of custom input validation you'll need to do. Also notice that
you can manipulate widgets in the UI or in code.

Making a Sample Layout
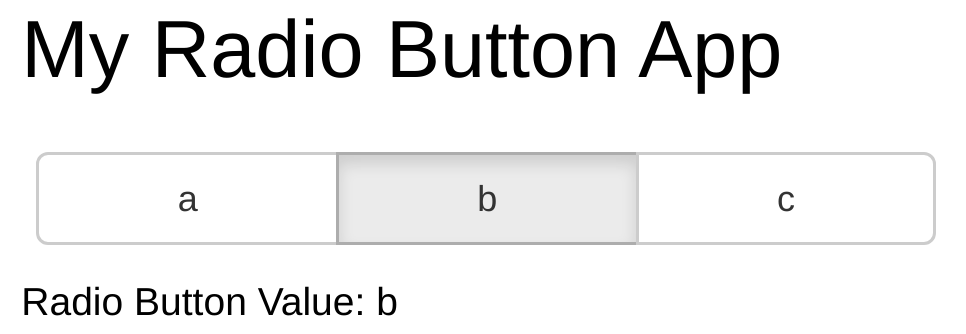
We combine a widget and some markdown panes with a Column panel in the next cell.

You'll notice the display doesn't update when a different radio button is pressed. To update we need to make a function to call when a specific widget's value is modified.
Note: Panel has four different API's. This learning aid uses the callback API, which is the lowest level of the four and gives the most control.
Be careful about running the above cell multiple times. Doing so will attach multiple function callbacks to the radio button, and the app may not behave as expected. Restarting the kernel and rerunning the cells will fix this.
You may be wondering why the if statement in the update function is needed. In
this simple example, it's not. However, as we add more widgets I've found it's
nice to have a single update function for all widgets in order to more precisely
specify the order in which pane updates need to happen as well as share
intermediate results computed during the update function.
3. Holoviews Plots
The app above could serve as the start of many, many apps, but how exactly do we update plots based on widgets instead of just some text? It's pretty simple, we just replace the Markdown pane with a HoloViews pane. The Panel HoloViews pane is a wrapper around Holoviews plots. Other plotting libraries (matplotlib, plotly, etc.) are supported as well, but I'll be demonstrating with Holoviews plots.

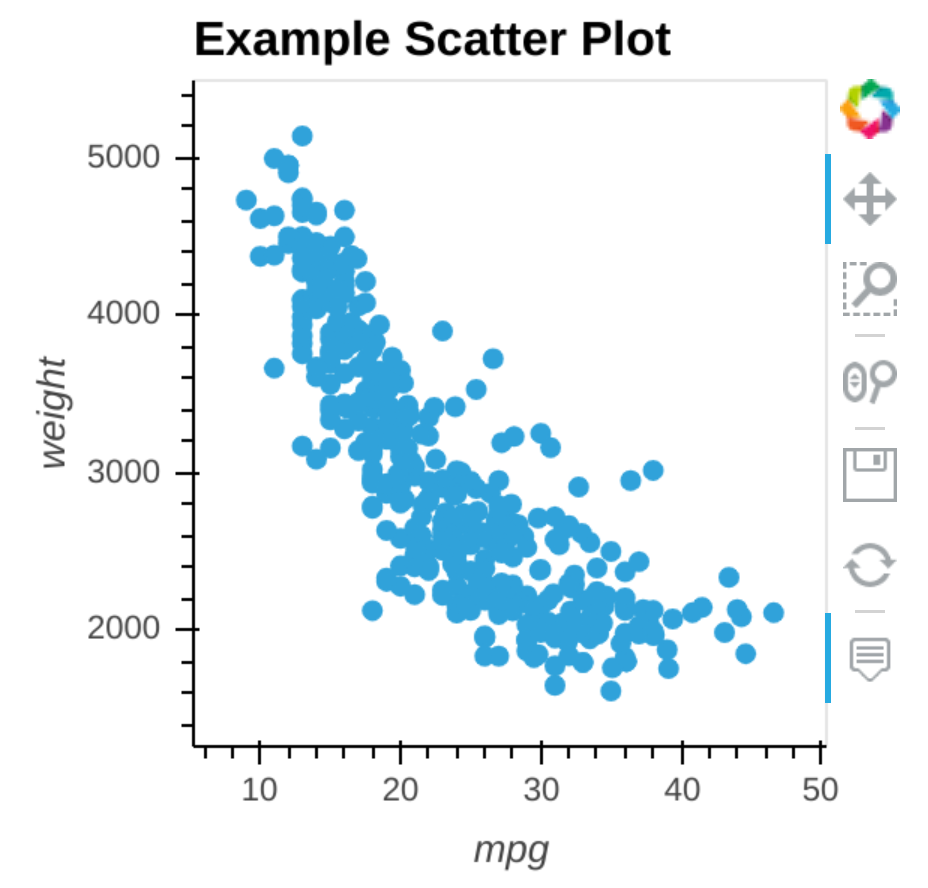
A complete tutorial of plotting in Holoviews is beyond the scope of this
learning aid. For this example, just know that
hv.Scatter(dataframe, kdims="x_column", vdims="y_column") will produce a
scatter plot. The HoloViews documentation can be
consulted for additional specifics.
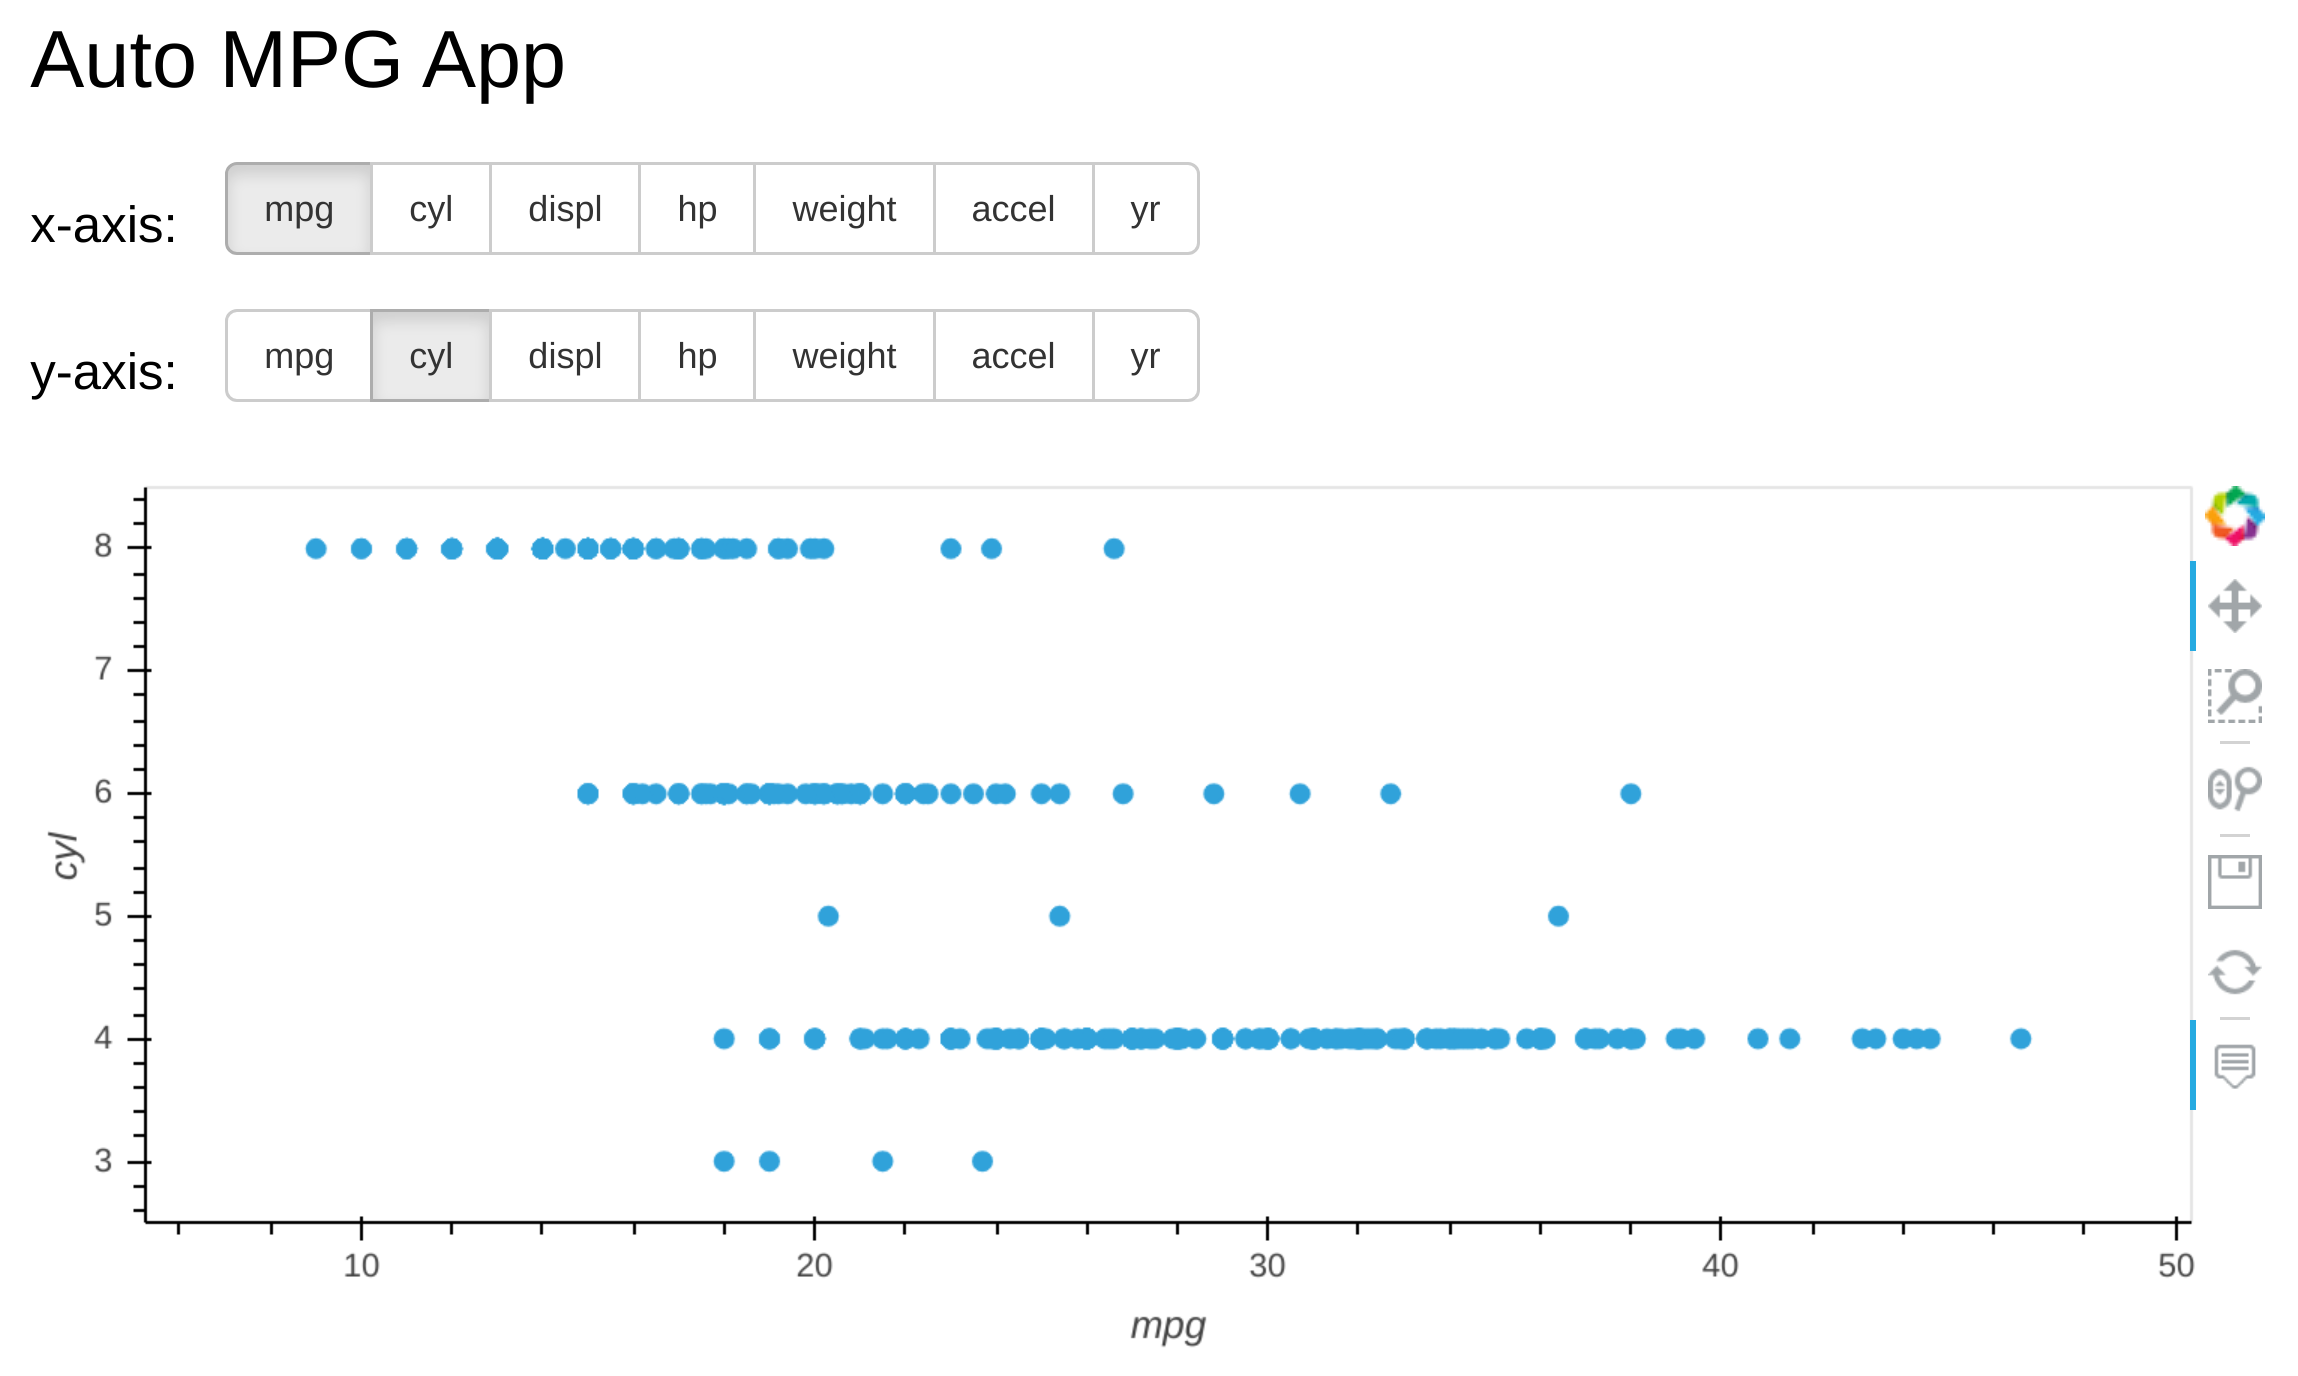
Let's make an app which toggles the axes of the plot. First we'll make the radio buttons to toggle the axis.

Now let's set up the layout of the plot.
Next, let's configure the plot to update when the widget values are changed.
Be careful about running the above cell multiple times. Doing so will attach multiple function callbacks to the radio button, and the app may not behave as expected. Restarting the kernel and rerunning the cells will fix this.
4. A Note on App Deployment
After you build an app, you'll want to deploy the app so others can view it.
Deployment is beyond the scope of this learning aid, but the
Panel server deployment documentation covers a variety of
deployment scenarios. MyBinder is useful for apps that are for demonstration
purposes only. If you want to see how your app would look deployed by itself,
then you can run app.show() in the notebook, and a new browser tab will open
up with the app served on it. Run the cell below to see it in action.
Now that you have a simple app to start from, keep going and build your own!
If you liked this article, check out this Panel article on Working Across Panel and ipywidgets Ecosystems!

